Getting Started
Welcome to IntelliToggle, a Dart-native feature flag service built to give you fine-grained control over feature releases, testing, and environments with minimal overhead.
This guide will walk you through how to create your first project and implement feature flags in a Dart or Flutter application.
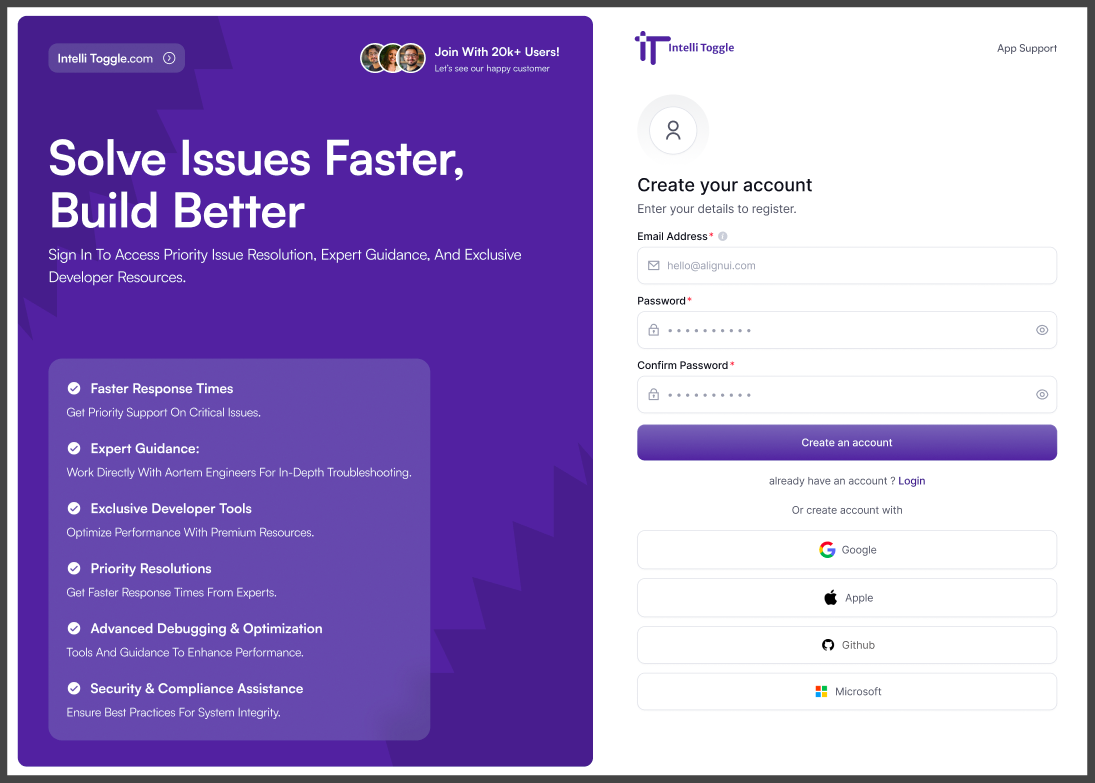
Step 1: Create an IntelliToggle Account
Visit IntelliToggle and sign up for an account.
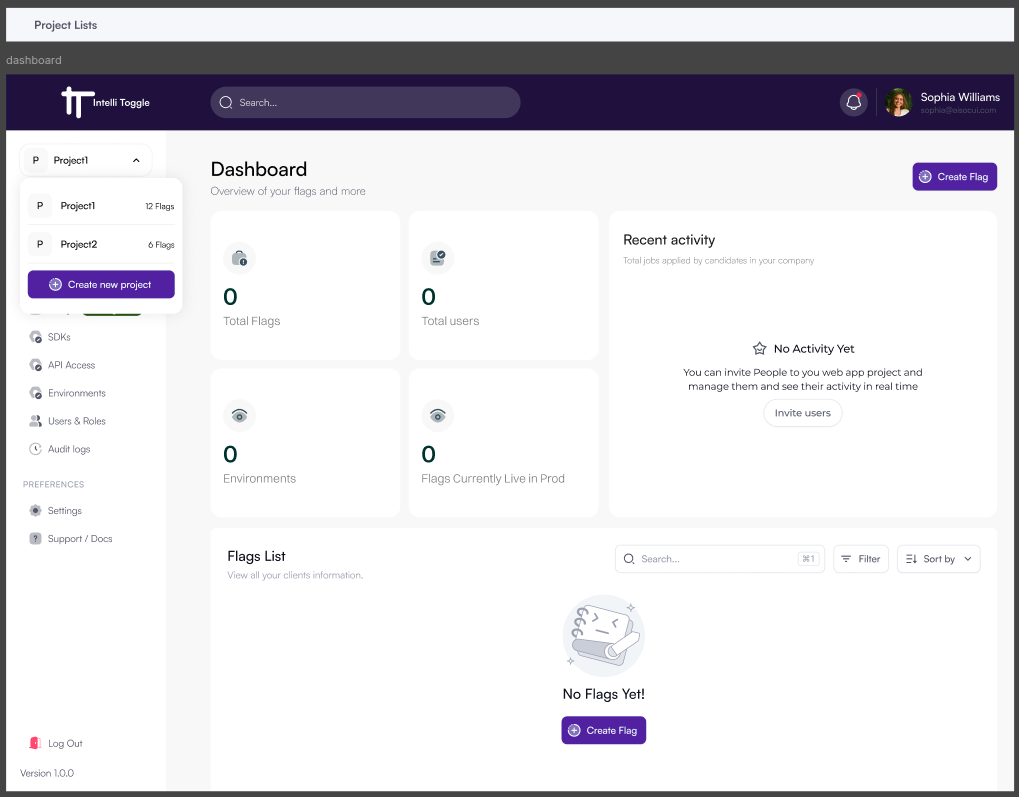
Once signed in, you’ll land on your dashboard. From here, you can create Projects, Environments, and Flags.
Step 2: Create a Project
-
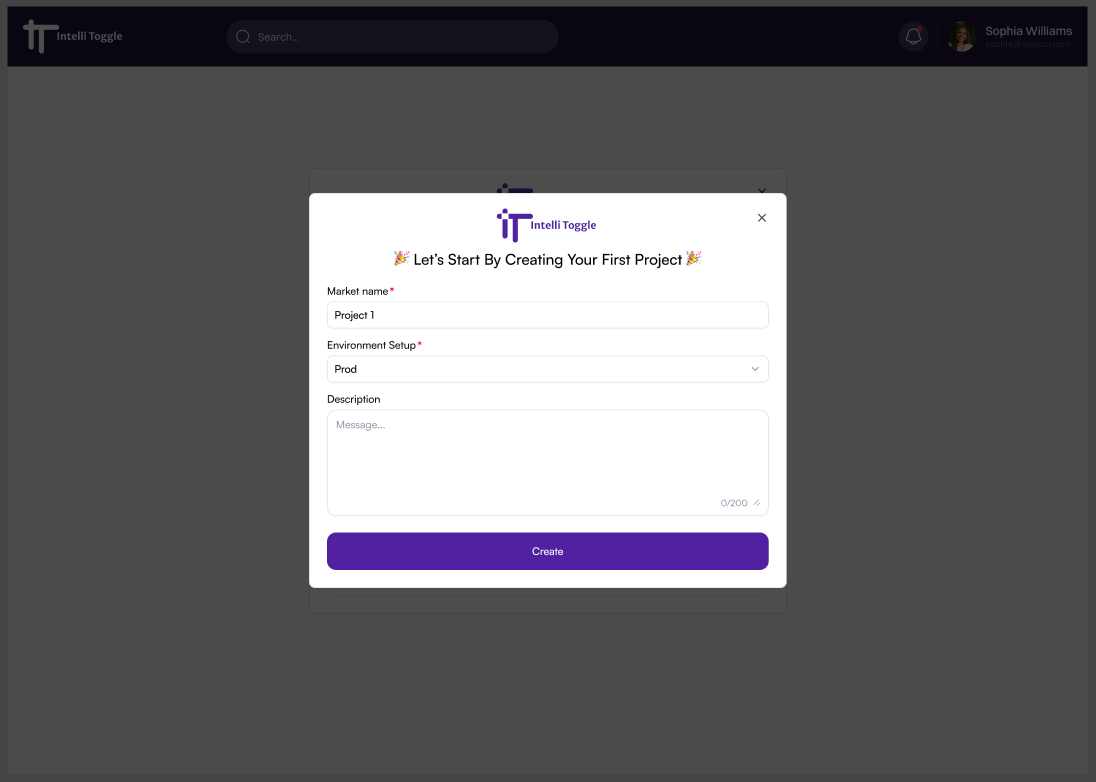
After signing in, a modal pops up to create a New Project.
-
Enter a name for your project (e.g.,
My Flutter App). -
Select an Environment Setup.
-
Optionally, add a description.
-
Click Create.
Each project includes at least one default environment (e.g., development, staging, production).
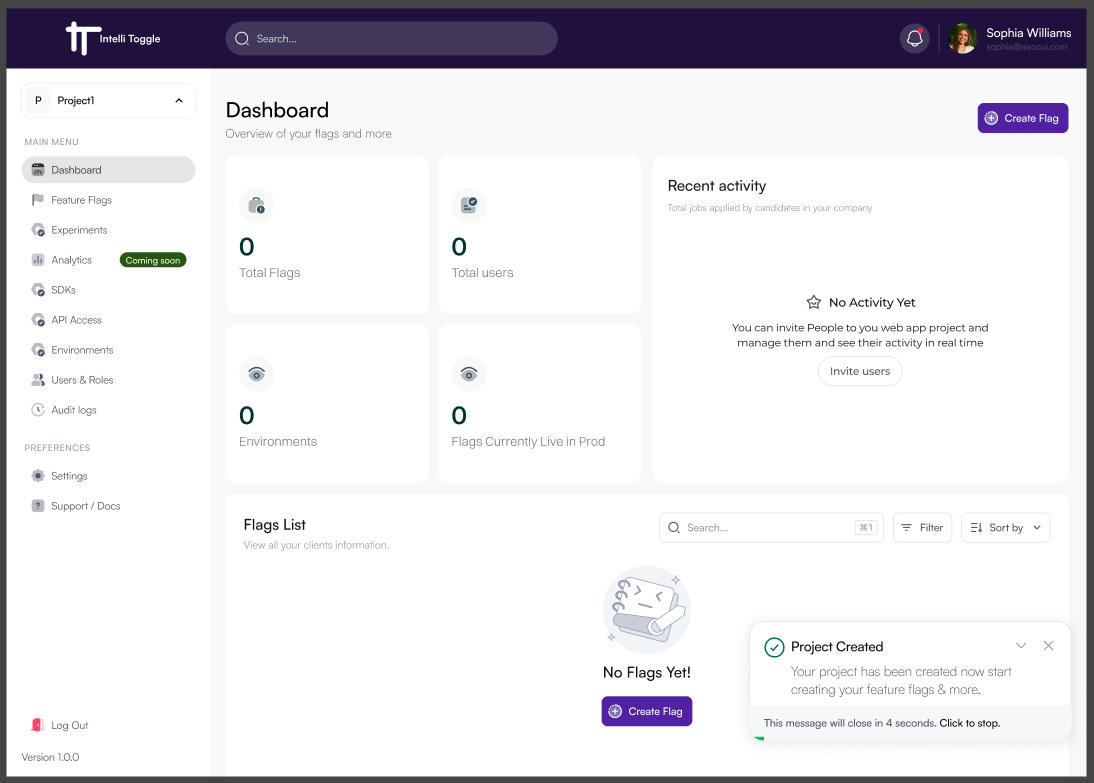
After successfully creating your first project, you’re redirected to the dashboard. You’ll notice a success message at the bottom right corner of your dashboard.
Step 3: Create OAuth2 Client Credentials
IntelliToggle uses OAuth2 Client Credentials flow for enterprise-grade security instead of static API keys. This provides automatic token rotation, scope-based permissions, and built-in subscription validation.
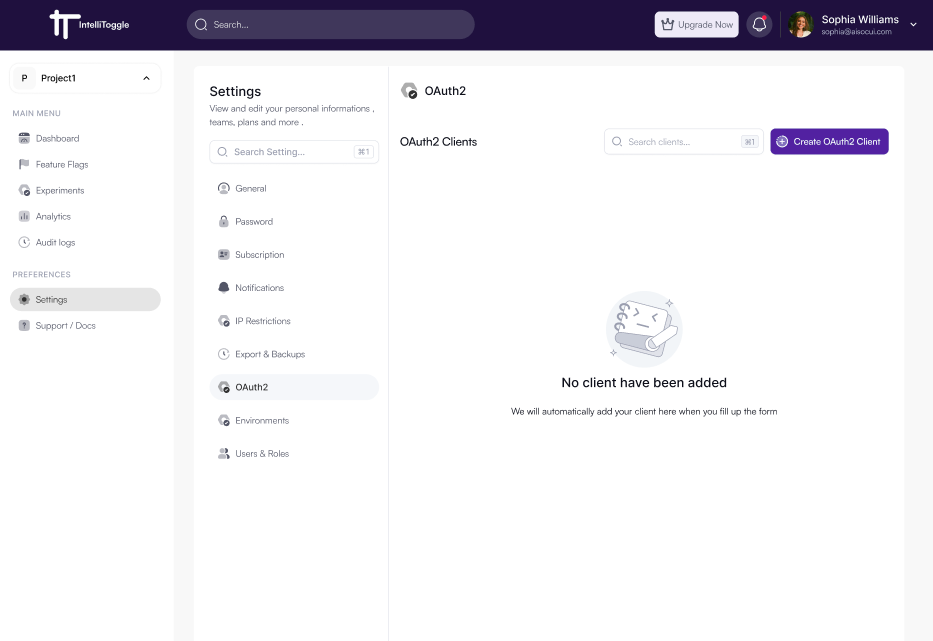
Step 1: From your dashboard, click Settings from the left sidebar.
Step 2: On the new page click, Create OAuth2 Client button.
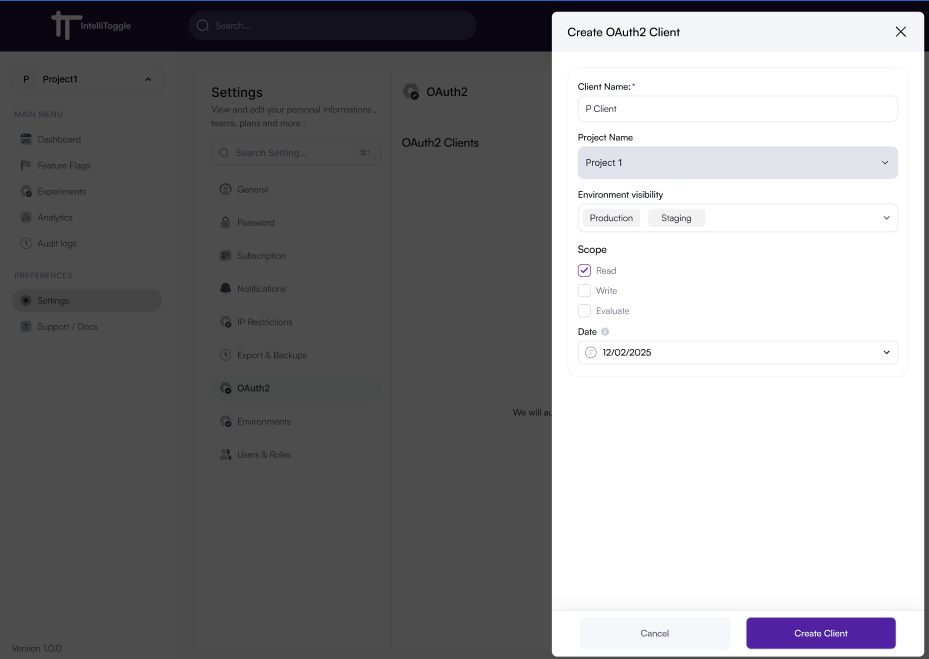
Step 3: Fill in details such as Client Name, Project Name, Environment visibility, Scope, and Date.
Step 4: Click the Create Client button.
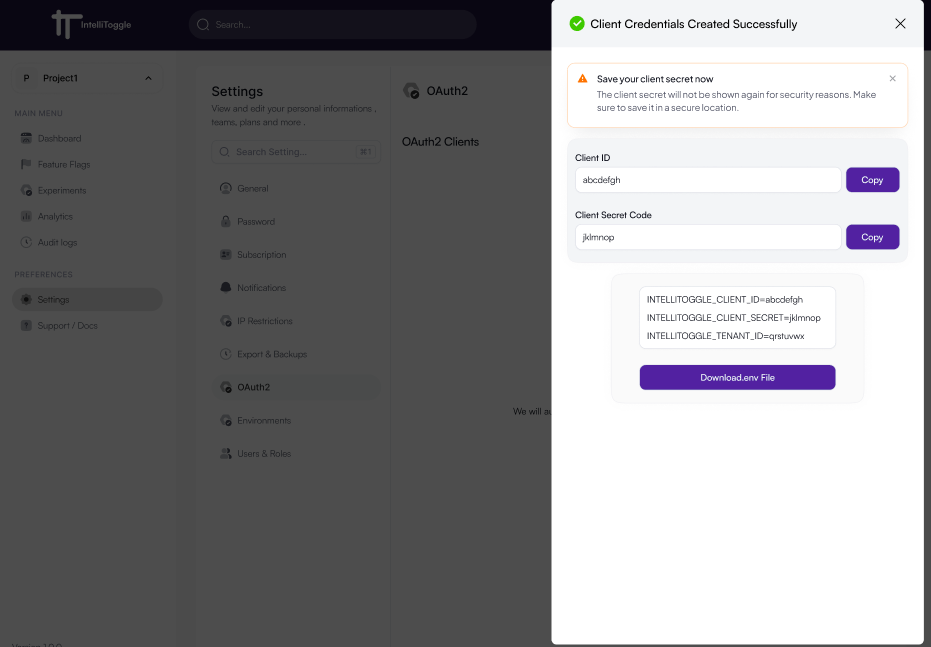
Step 5: Copy the Client ID, Client Secret Code, and other environmental variables and save in a .env file.
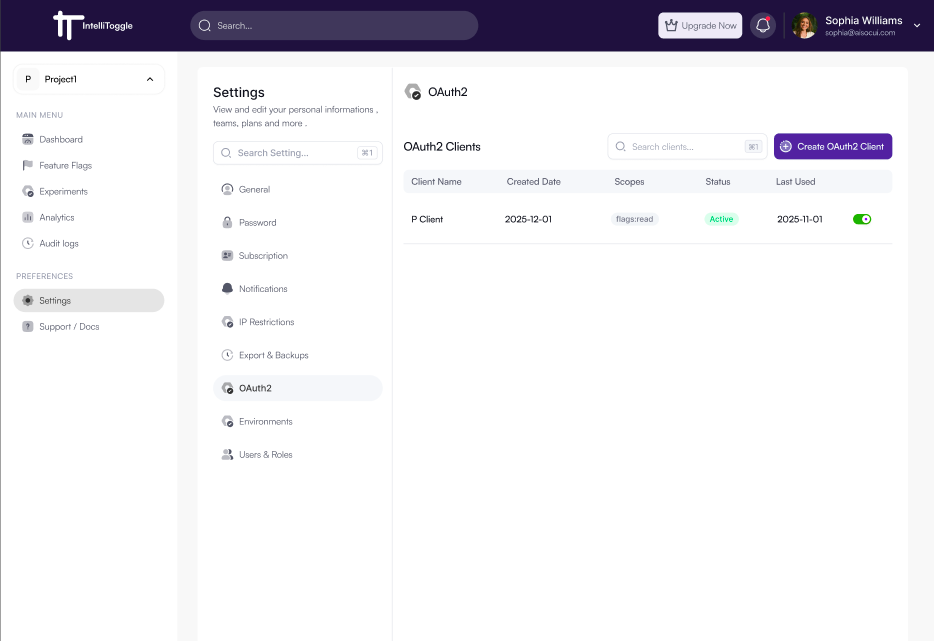
You can view your list of active/inactive OAuth2 Clients.
POST Request Endpoint: http://api.intellitoggle.com/api/oauth/clients
Headers:
Content-Type: application/json
Authorization: Bearer <your-user-token>
X-Tenant-ID: <your-tenant-id>
Body:
{
  "name": "My Production App",
  "scopes": ["flags:read", "flags:write", "flags:evaluate"]
}
Scopes Explained:
-
flags:read- List and get flags -
flags:write- Create, update, delete flags -
flags:evaluate- Evaluate flags for users
Response:
{
  "clientId": "client_1753961369992",
  "clientSecret": "cs_1753961369992_secret",
  "name": "My Production App",
  "scopes": ["flags:read", "flags:write", "flags:evaluate"],
  "isActive": true,
  "createdAt": "2025-07-31T13:20:29.002020Z"
}
Critical Security: Store clientId and clientSecret as environment variables. Never commit to version control.
|
Step 4: Install Dependencies
Add the following required dependencies to your pubspec.yaml file:
dependencies:
  openfeature_dart_server_sdk: ^0.0.10
  openfeature_provider_intellitoggle: ^0.0.4
  http: ^1.1.0
  dotenv: ^4.0.1
On your terminal run:
dart pub getStep 5: Environment Setup
Create .env file or set environment variable:
Linux/macOs:
# OAuth2 Client Credentials (from Step 2)
export INTELLITOGGLE_CLIENT_ID="client_1753961369992"
export INTELLITOGGLE_CLIENT_SECRET="cs_1753961369992_secret"
export INTELLITOGGLE_TENANT_ID="tenant_17536855945594559"

# API Base URL
export INTELLITOGGLE_API_URL="http://api.intellitoggle.com"
Windows:
# OAuth2 Client Credentials (from Step 2)
set INTELLITOGGLE_CLIENT_ID="client_1753961369992"
set INTELLITOGGLE_CLIENT_SECRET="cs_1753961369992_secret"
set INTELLITOGGLE_TENANT_ID="tenant_17536855945594559"

# API Base URL
set INTELLITOGGLE_API_URL="http://api.intellitoggle.com"| Security: Never hardcode SDK keys in source code. |
Step 6: OAuth2 Basic Usage
Get started with IntelliToggle in your Dart application using OAuth2 authentication in just a few steps.
Quick Setup
-
Initialize the provider with your OAuth2 client secret and production settings
-
Set the global provider to make it available throughout your application
-
Create a client with your service metadata
-
Evaluate feature flags with user context and targeting
import 'package:openfeature_dart_server_sdk/openfeature_dart_server_sdk.dart';
import 'package:openfeature_provider_intellitoggle/openfeature_provider_intellitoggle.dart';
import 'dart.io';
void main() async {
// Initialize provider with OAuth2 client secret
final provider = IntelliToggleProvider(
sdkKey: Platform.environment['INTELLITOGGLE_CLIENT_SECRET']!,
options: IntelliToggleOptions.production(),
);
// Set as global provider
await OpenFeatureAPI().setProvider(provider);
// Create client
final client = IntelliToggleClient(
FeatureClient(
metadata: ClientMetadata(name: 'my-service'),
hookManager: HookManager(),
),
);
// Evaluate flags
try {
final enabled = await client.getBooleanValue(
'new-api-endpoint',
false,
targetingKey: 'user-123',
evaluationContext: {
'role': 'admin',
'plan': 'enterprise',
'region': 'us-east',
},
);
print('Feature enabled: $enabled');
} catch (e) {
print('Flag evaluation failed: $e');
}
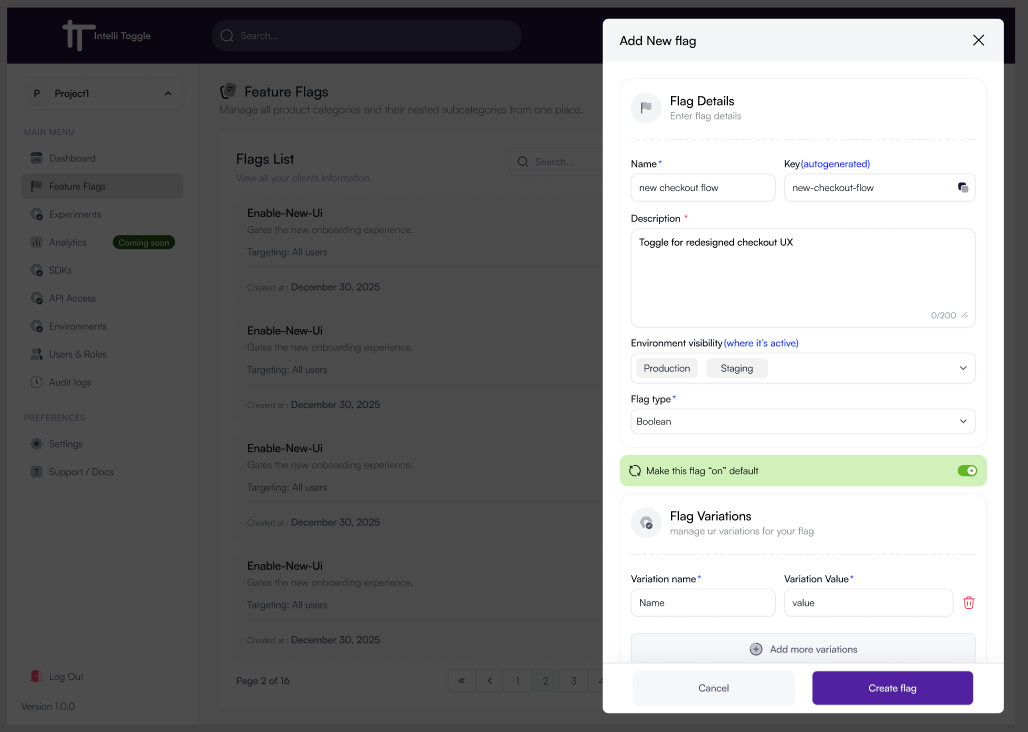
}Step 7: Create a Feature Flag
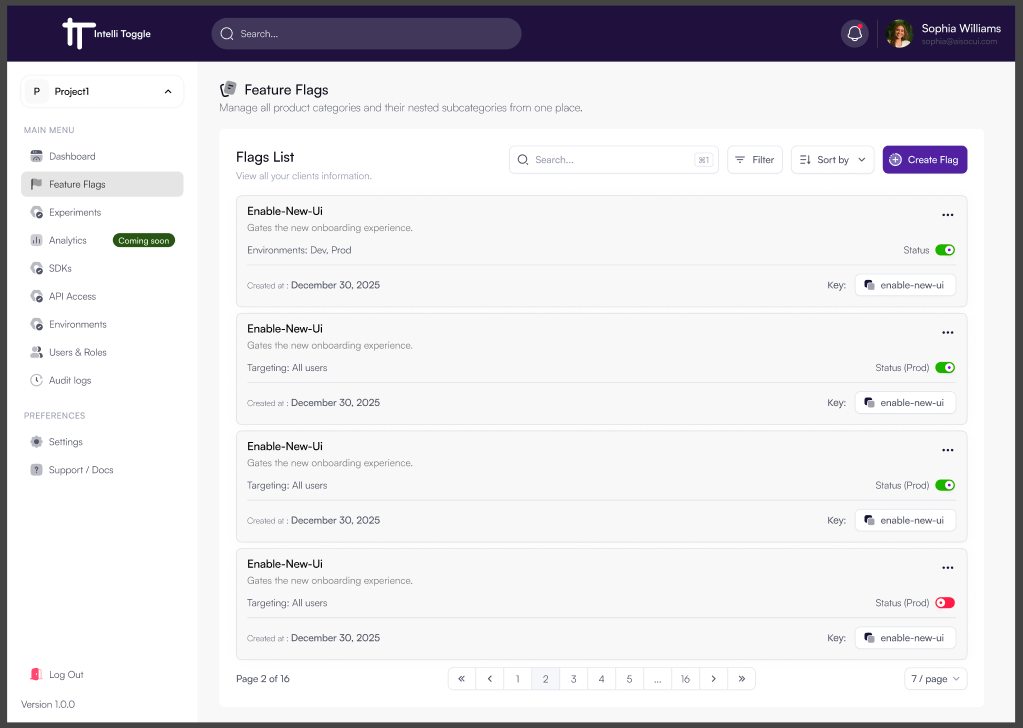
-
Navigate to your dashboard.
-
Open the Flags tab.
-
Click Create Flag.
-
Enter name and description while a unique flag key (e.g.,
new-checkout-flow) is autogenerated. -
Select Environment Visibility (e.g. staging, production).
-
Select Flag Type (e.g. Boolean).
-
Choose a default value (
onoroff). -
Optionally fill in the Variation name and value.
-
Click the Create Flag button to complete process.
Step 8: Roll Out a Feature
Go back to the flag in the dashboard.
Enable it for the environment you’re targeting.
Optionally add targeting rules, percentage rollouts, or schedule activations.
What’s Next?
Need help? Visit to get started or join the community.